Python and Jupyter Overview

Python
Python is...
- a high-level, structured, open-source, interpreted programming language
- a really good choice for almost any programming task
- a very popular and effective choice for data science tasks
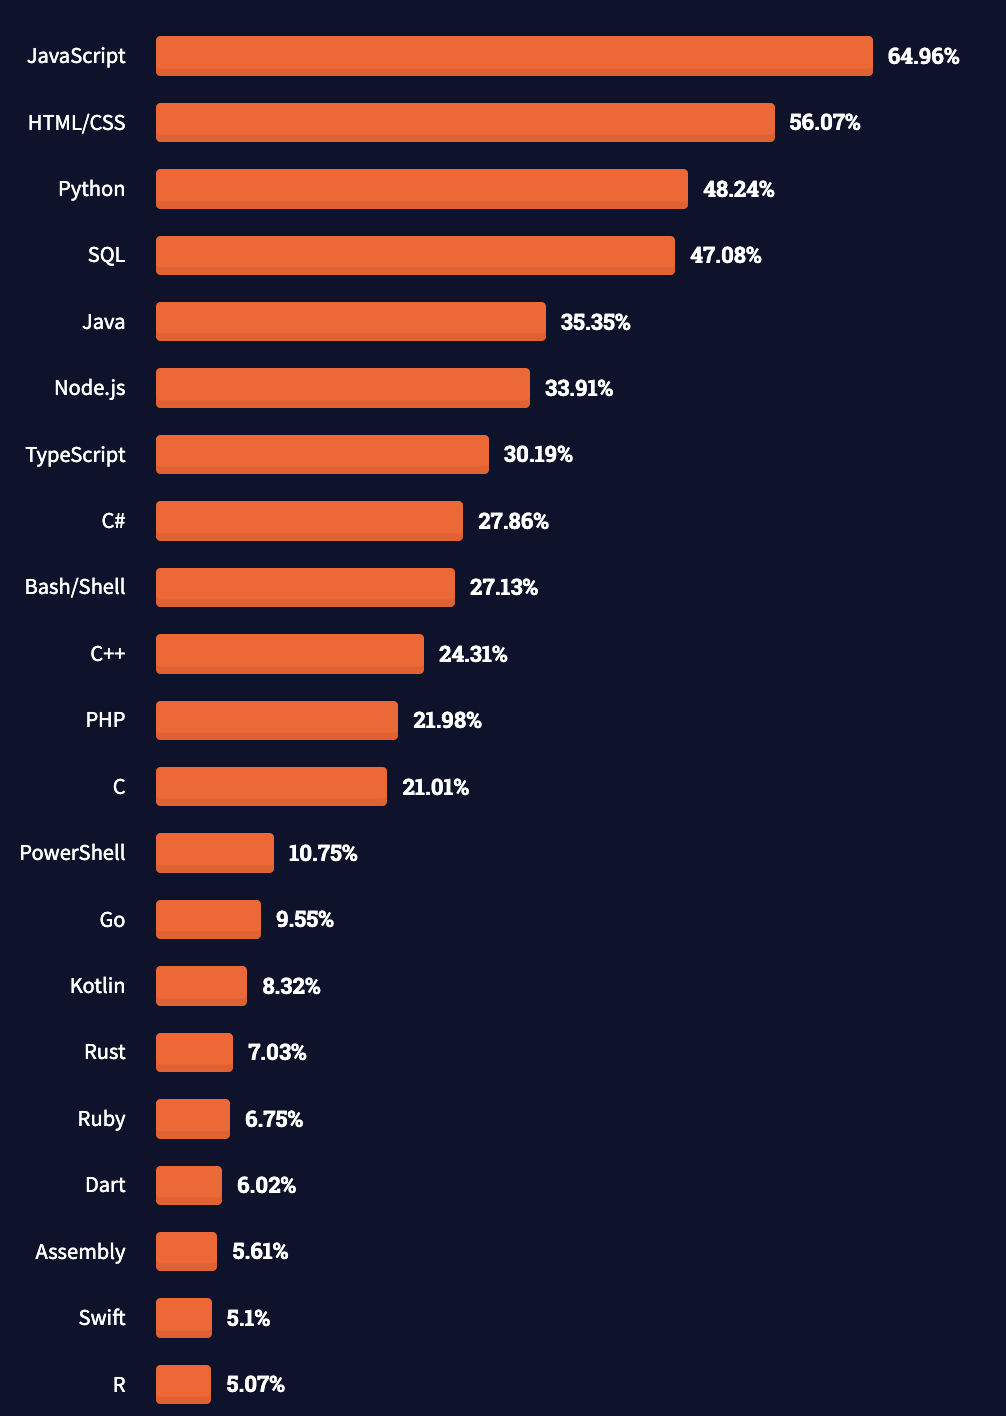
According to StackOverflow Trends, more than 11 percent of Stack Overflow questions were tagged with "python" in late 2018. All other languages fell well short of this number:
| Language | Percent |
|---|---|
| Python | 11.2% |
| Java | 7.7% |
| C++ | 2.75% |
| R | 2.7% |
| Matlab | < 1% |
| Scala | < 1% |
| SAS | < 1% |
| Julia | < 1% |
More recently, the 2021 Stack Overflow Developer Survey shows that Python is used by over 48% of all "developers"
Python in the real world
Python is one of the the most popular programming languages in the world. It's commonly used for:
- Application development
- Scripting
- Automation
- Testing
- Data science
Python in data science
As previously mentioned, Python is also a popular choice in data science. For reference:
- According to KDNuggets, 65.6 percent of data scientists used Python regularly in 2018. This was an increase from 54 percent in 2017.
- In contrast, R was used by 48.5 percent of data scientists in 2018. This was a decrease from 63 percent in 2017.
Note
Disclaimer: R is terrific and an excellent tool for data science.
Why are data scientists choosing Python?
- It can do anything...so everybody uses it
- Consistency across engineering and data science teams
- Open-source and community support
- Concise syntax, readability and ease-of-use
- Strength in numeric computations and cutting edge data science libraries
Jupyter
JupyterLab is...
- a language-agnostic integrated development environment (IDE) specializing in notebooks
- a popular choice among data scientists using Python
Note
We've chosen to use Jupyter over other popular IDEs for this course but that does not mean it is always the best IDE for writing Python.
Why are data scientists choosing Jupyter?
- Ad-hoc analyses and science development
- Synchronous data visualizations
- Documentation of code with accompanying comments
- Flexibility through extensions
Reasons you may want to use another IDE...
- Jupyter is not good for developing scripts, or Python code that isn't run interactively
- It's not trivial to install and launch Jupyter without a tech background
Note
We've minimized these challenges for this workshop by using Binder. If you are interested in installing and using Jupyter and Python on your own machine, we recommend using Anaconda to do so.
Jupyter Basics
Launching Jupyter
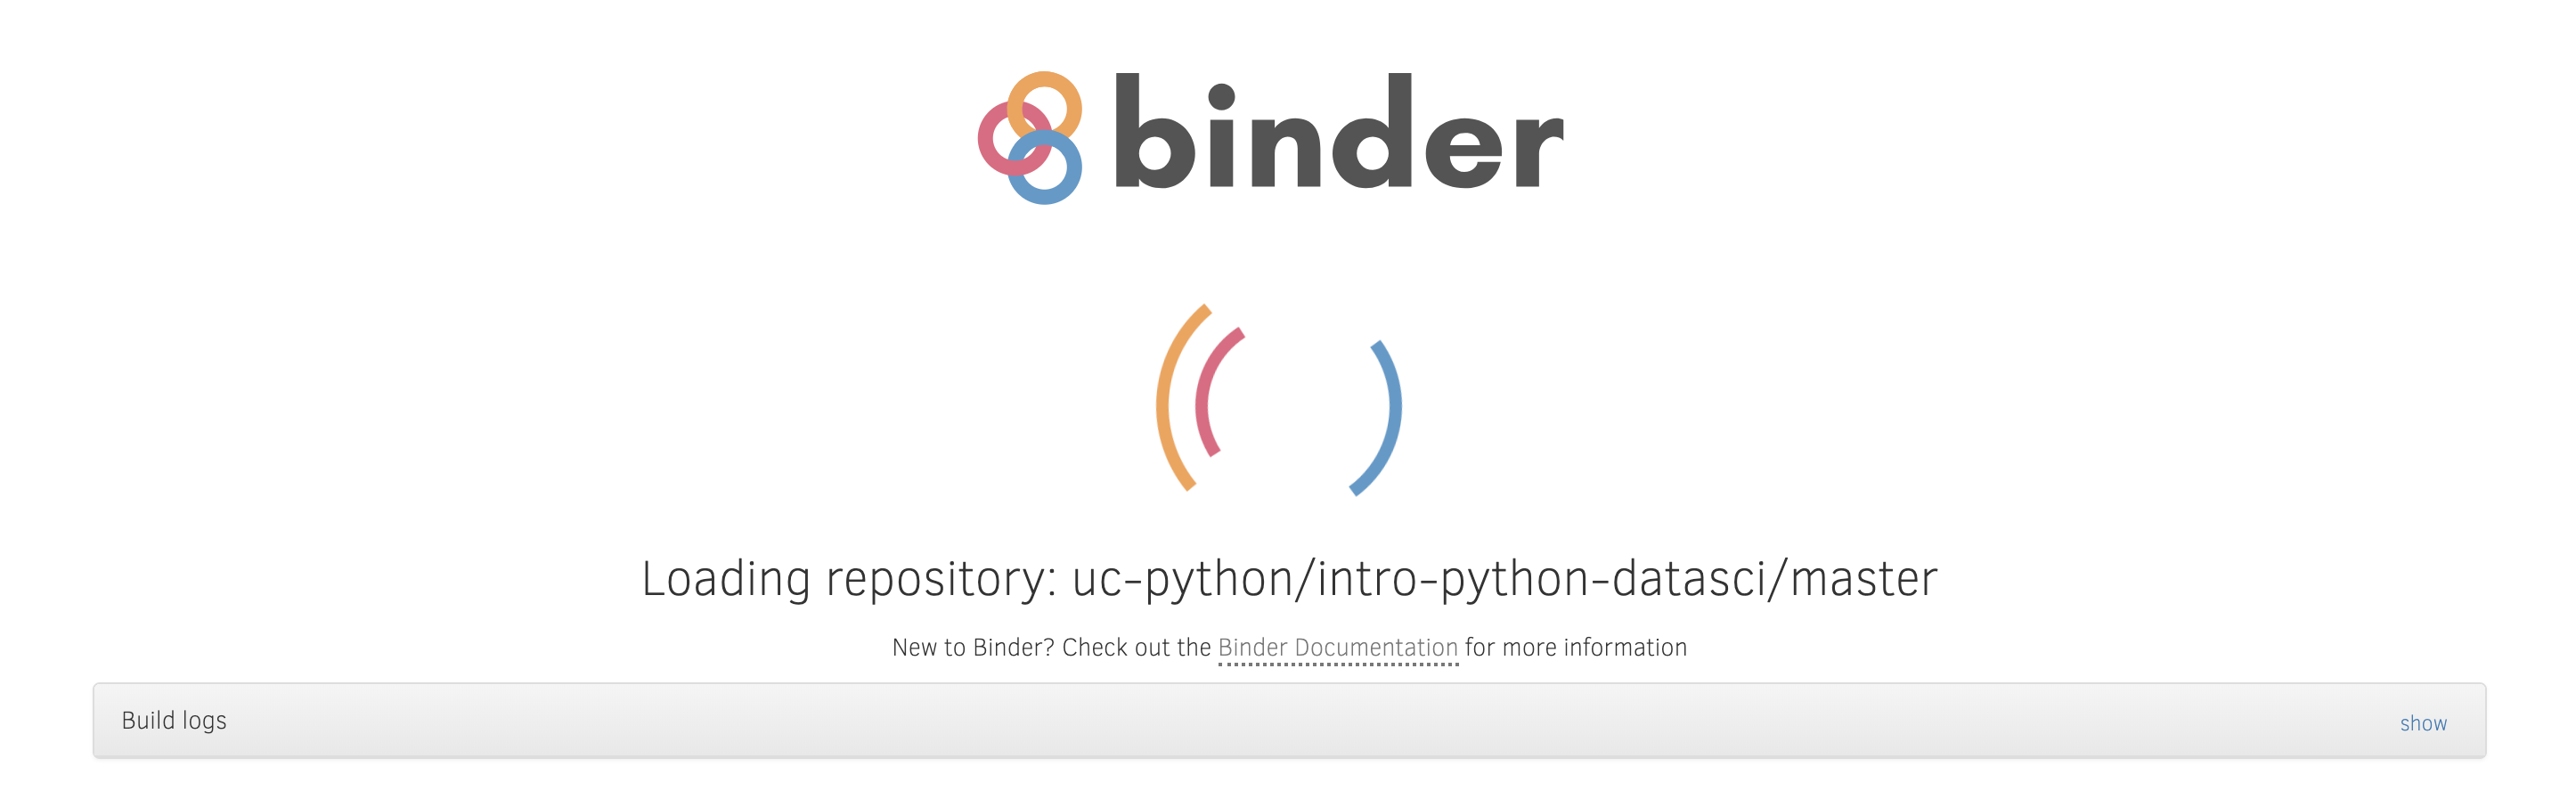
Let's begin by launching Jupyter by opening the Binder repository. This is how we will access Jupyter throughout the course.
You should see a screen like this:
Jupyter can also be launched via Anaconda Navigator:
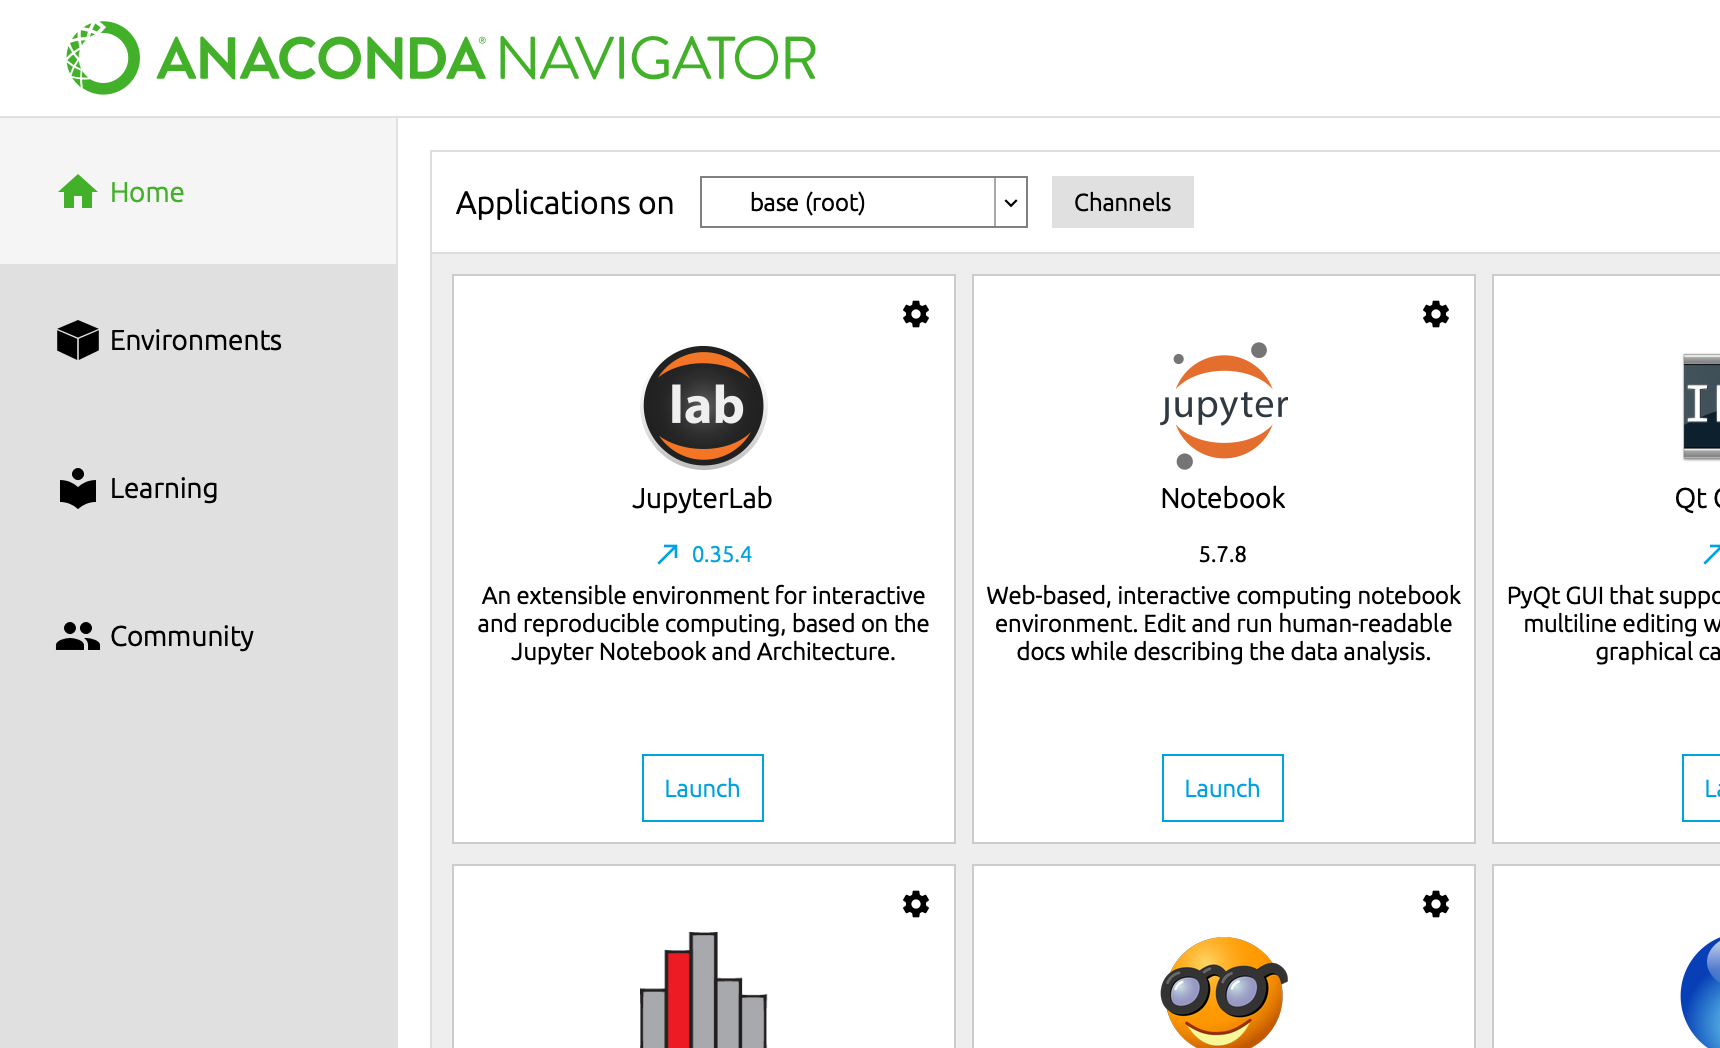
Note that we want to launch the JupyterLab option for this class.
Jupyter File Structure
As you can see, Jupyter displays a file browser when it launches:
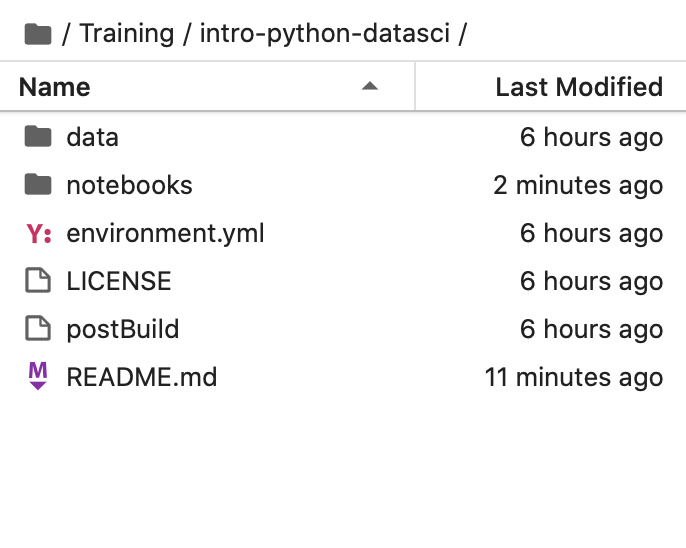
There is just one directory for you to worry about:
notebooks - interactive slideshows and code for you to follow along with
Jupyter Notebooks
The notebook is the core file used to interact with Python from Jupyter. A few details:
- Notebooks allow the writing AND running of Python code
- Notebooks are organized by cells - code and commentary text goes in the cells
- All notebook files have the extension
.ipynb(interactive python notebook)
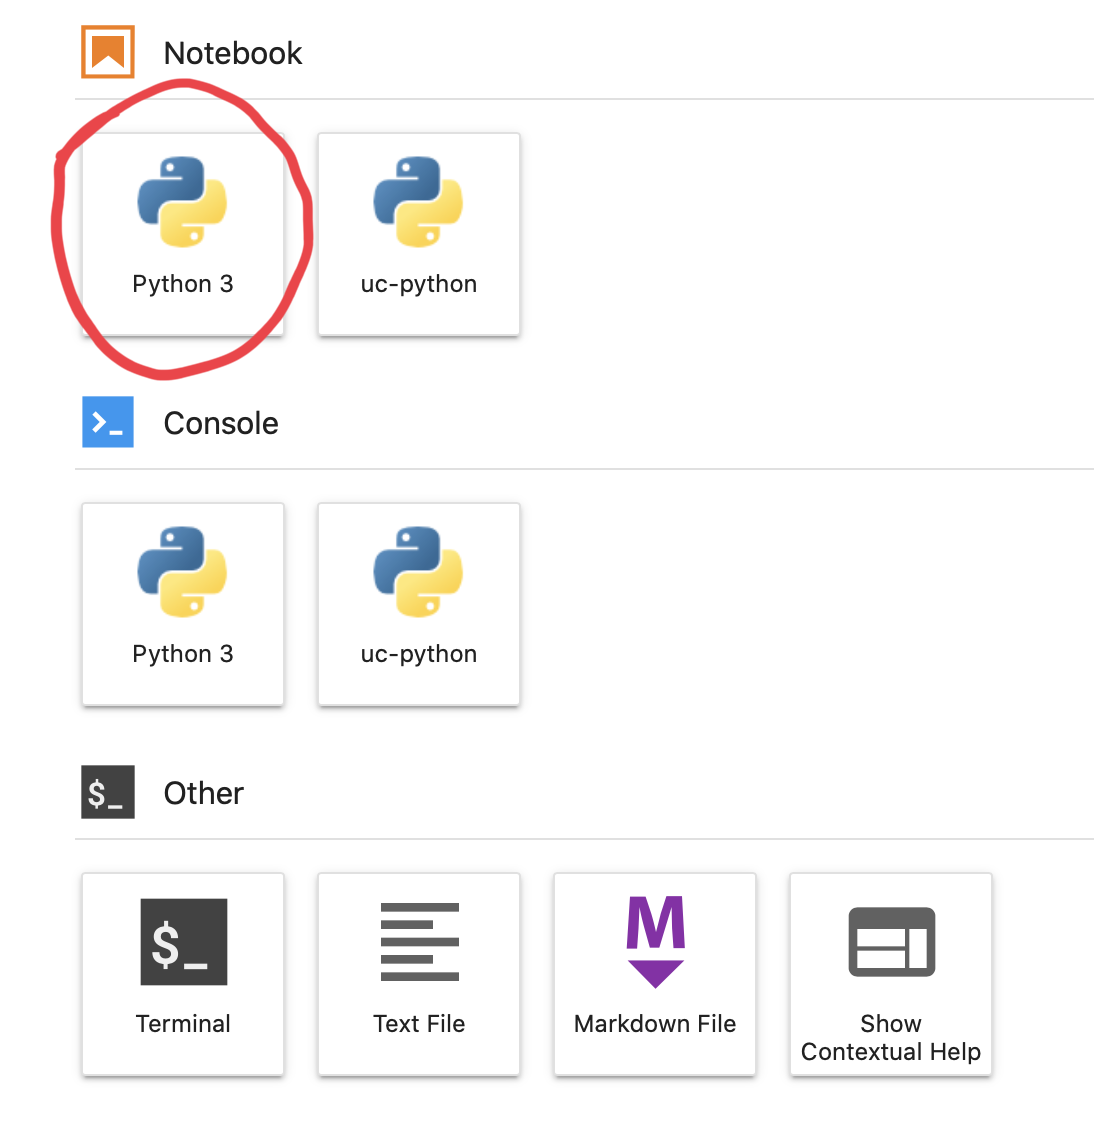
A new Jupyter notebook can be opened from the "launcher" page, which opens automatically when you start JupyterLab.
There may be multiple options listed in the Notebooks section, as seen here. These are different Python installations available on your computer. You should choose Python 3 in this case.
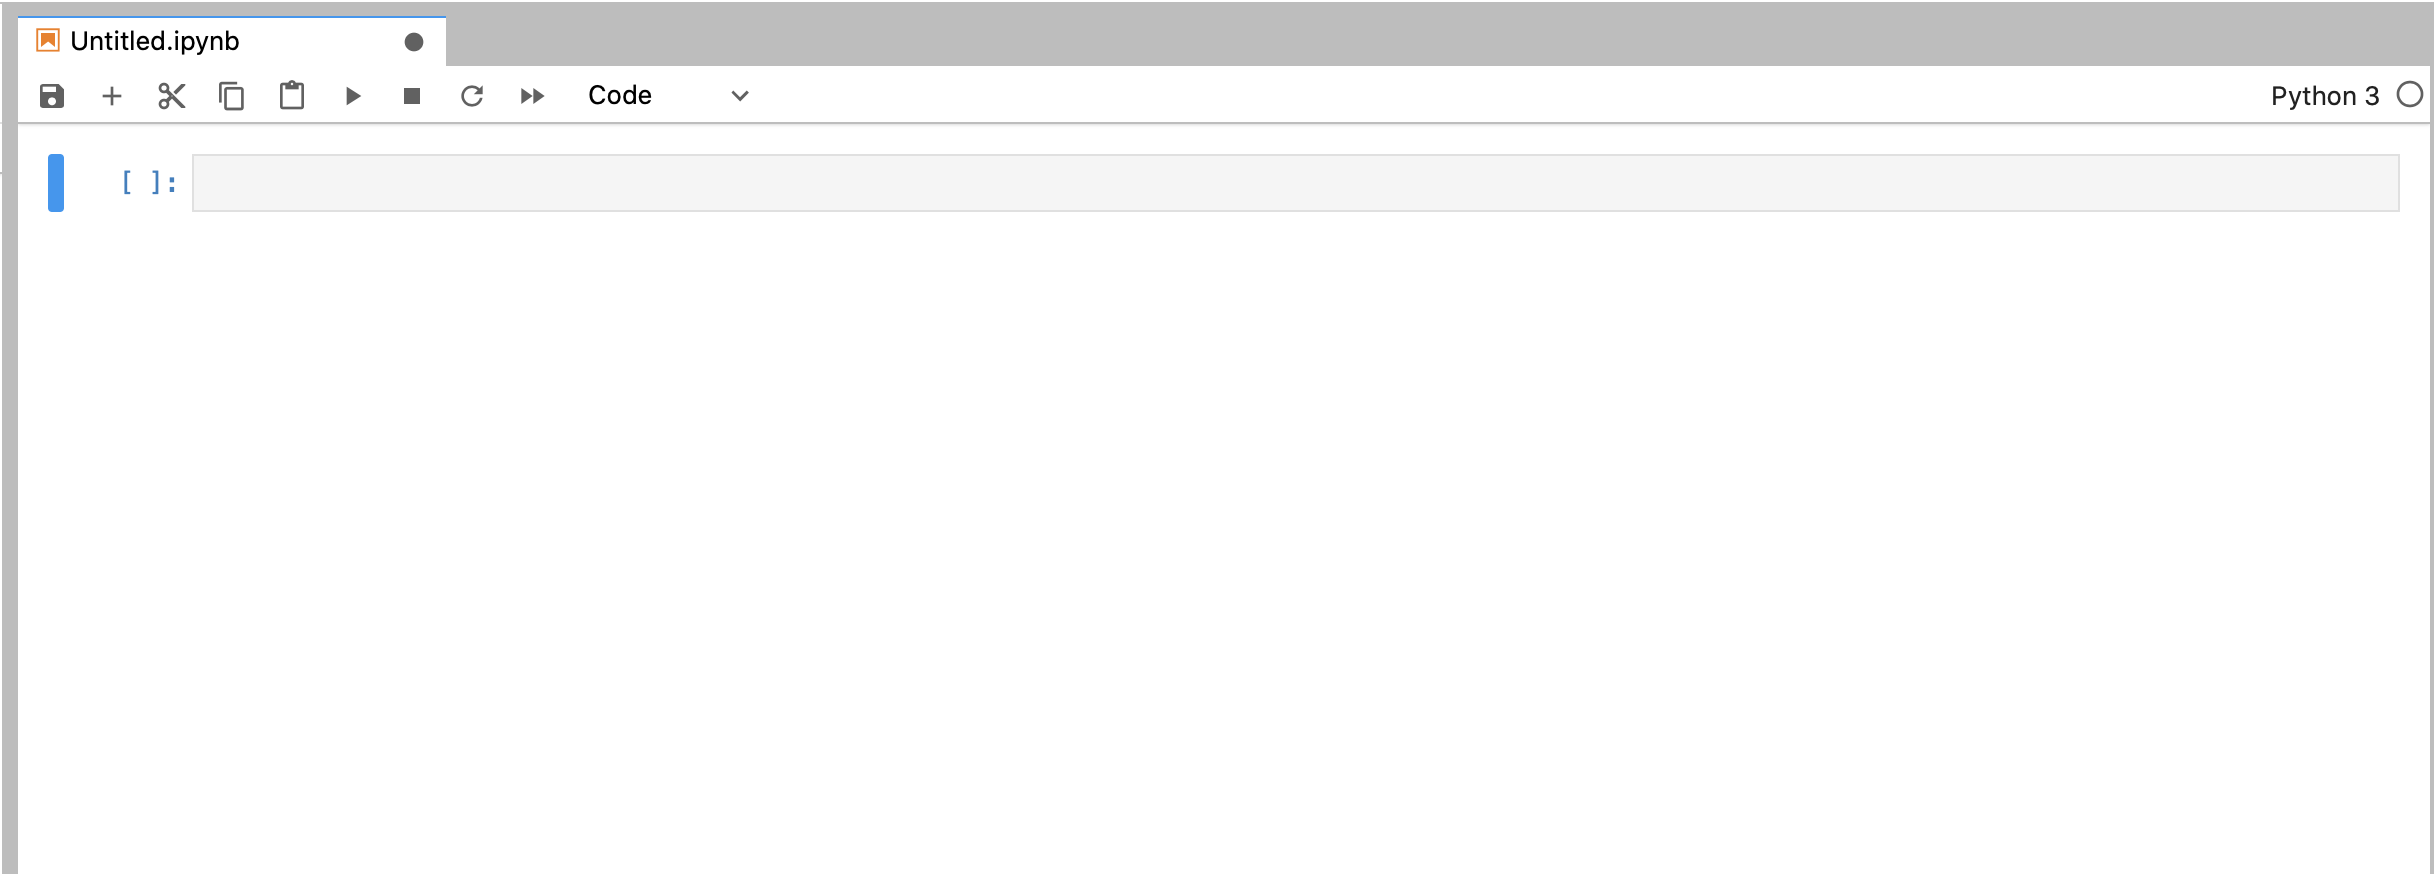
This will open a new notebook with a Python 3 kernel:
Notebook Cells
As previously mentioned, Jupyter notebooks are organized by cells. These cells are at the core of a notebook:
- When using Jupyter, all Python code is typed into and run from a cell
- Comments, markdown, HTML, LaTeX can also be rendered within a cell
Code Cells
By default, all cells are code cells. This means Python code can be run by simply:
- Clicking on a cell's input area
- Typing Python code into the cell
- Pressing CTRL + RETURN (or SHIFT + RETURN)
The results of the code will be printed to the output area:

Comment/Markdown/HTML/LaTeX Cells
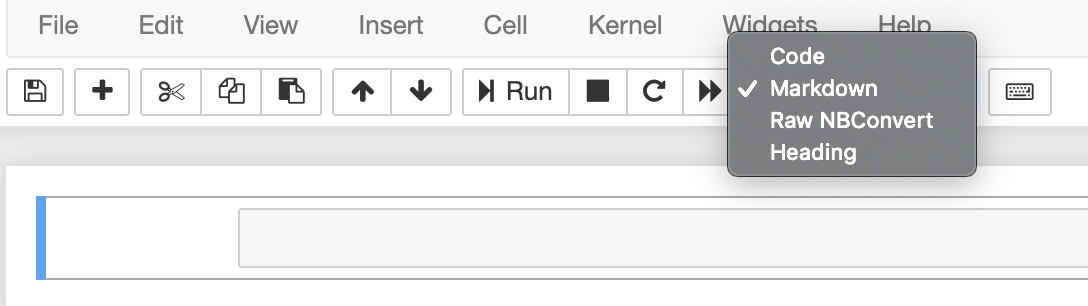
Cells can be converted to text-oriented cells by:
- Selecting a cell by clicking on it
- Clicking the "Code" dropdown on the edit panel
- Clicking the "Markdown" option
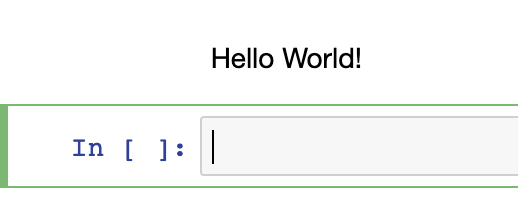
Text can then be typed into these cells (regular text, markdown, HTML, LaTeX):

And it can be rendered by pressing CTRL + RETURN:
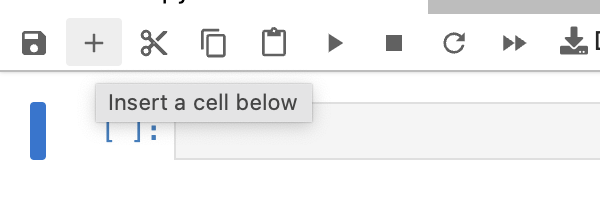
Inserting New Cells
New cells can be inserted by selecting a cell by clicking on it and
- Clicking the "+" menu button add a new cell below the selected one
- Or using the keyboard shortcut
"a"to insert cell above or"b"to insert cell below
Your Turn
- Create or open a notebook in Jupyter.
- Create a new markdown cell. Write your name in it.
- Create a new code cell. Write
x = 5and run it.
Additional Tips
- Notebooks can be saved by clicking "File" -> "Save Notebook As..."
- An easy way to find a feature or its related keyboard shortcut is "View" -> "Activate Command Palette"
Notebooks can be downloaded from Binder in numerous formats by clicking "File" -> "Download"
This is a great way to save your work when using Binder. These notebooks can then be reloaded at any time.
Caution!
New content created in Binder does not persist across sessions. Also, Binder tends to shutdown after a few minutes of inactivity. Save and download your work accordingly!
Questions
Are there any questions before moving on?