Python Kernels and Environments
Applied Review
Applying Functions to DataFrames
- Series and DataFrame objects both support the
.applymethod
.applytakes a function as an argument and maps it to each element of the Series or row/column of the DataFrame, returning the combined outputs as a Series or DataFrame.
Python from the Shell
- The shell is a text-only interface available on almost all computers.
- The shell is alternatively called the terminal or the command line.
- There are two main ways to use Python from the shell:
- The REPL, an interactive Python prompt
- Python scripts, plain-text files containing Python code
- Python scripts are a better option than notebooks for batching code, building libraries, and developing large applications.
Environments and Packages
In our introductory Python training, we covered packages at a high level.
Packages are Python code libraries, which we can make available in our current Python session using the import statement.
There is a fairly small (<100) collection of packages that come with Python, termed the standard library, but thousands of packages in the wild. Most of these third-party packages are available on public repositories, such as PyPI -- the Python Package Index.
Versions
Not only does Python have many different packages, each package has many different versions.
A version is the state of a package at a given time. For example, Pandas had different functionality back in 2017 than it does now -- most popular packages are continually under development.
To keep track of package states, we use versioning, a system of labeling packages with a numeric code that tracks package development.
You can check the version of a package you've installed by looking at that package's .__version__ attribute (this works for most outside the standard library).
import numpy as np
np.__version__
'1.25.2'
import seaborn as sns
sns.__version__
'0.12.2'
We see three numbers here, separated by decimal points. This is the standard format of Python package versions.
The official name of this three-number versioning is semantic versioning. The numbers are MAJOR.MINOR.PATCH.
e.g. The Numpy package above has a major version of 1, a minor version of 25, and a patch version of 2.
Why so many numbers? Basically, smaller changes affect the patch or minor version numbers, and big changes that could break compatibility affect the major number.
That means that version 1.0.0 is newer than 0.99.99 -- just like regular decimal numbers, version numbers are such that any increase in a left-of-the-point number overwhelms difference in right-side numbers.
Packages and versioning is a big topic that we won't go too deep on today, but it's important to have some context around the Python package ecosystem to understand the value of environments.
Where the Trouble Begins...
One of the great strengths of Python and of open source software as a whole is the amazing amount of excellent code that is available for free in packages.
On the other hand, all this independently-managed code has its downsides.
Most packages depend on other packages, and all depend on Python. But if one package makes an update (or if a new version of Python changes old features), packages that depend on it may break!
For this reason, Python has evolved the notion of environments, isolated installations of Python with independent collections of packages.
The recommended way to use environments is to create a new one each time you begin a big project.
You install the newest version of Python and the packages you need, then do your work in it.
When you start your next project, maybe there's a new version of Python or of Pandas with handy new features that you want.
Now you can start a new environment and install the updated versions of the packages you like, without breaking your old project by forcing new packages into it -- it lives in its own environment, so installs you perform in the new environment won't affect it.
I have several environments on my laptop. I use one called "uc-python" for this workshop, and in it I've installed all the packages that are relevant to the training.
However, I also do some consulting projects -- and I don't want the packages I install for those to break things in today's training (or vice versa). So environments are super helpful to me!
| uc-python | my-project |
|---|---|
|
python 3.9 pandas 1.0 seaborn 0.11 scikit-learn 0.21 |
python 3.7 pandas 0.24 altair 3.0 networkx 1.4 |
Using environments does mean some extra work, though, so you probably don't want to make a new environment every time you start up Python.
Instead, it makes sense to create a new env (the short name for an environment) when you start something big -- code that really needs to still work next month or next year.
Conda
There are several tools to create manage environments in Python -- and sadly, they don't play nice together.
Each domain of Python tends to coalesce around one tool that everyone uses, but you are likely to hear mainly about two:
- virtualenv (or venv)
- conda
Conda is what we'll be talking about today. It's the de facto standard environment manager for data science (although that may not be the case forever, so it's worth keeping up with the data science news).
virtualenv dominates the web development space, as well as much of software development more generally. It's possible to use virtualenv for data science work, but it lacks some of the nice features you'll find in conda.
Using Conda
Conda commands are run via the shell, and typically begin with conda.
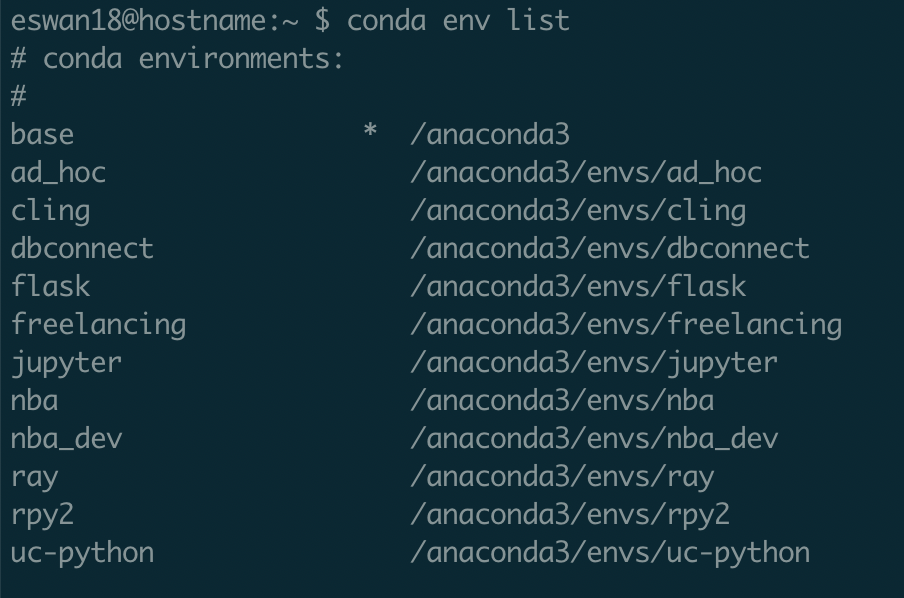
To list environments, run
conda env list
Conda will display all the environments set up on your computer, with a star next to the currently active one.
Here, I'm in the base (or default) environment -- that's typically the one you start in.

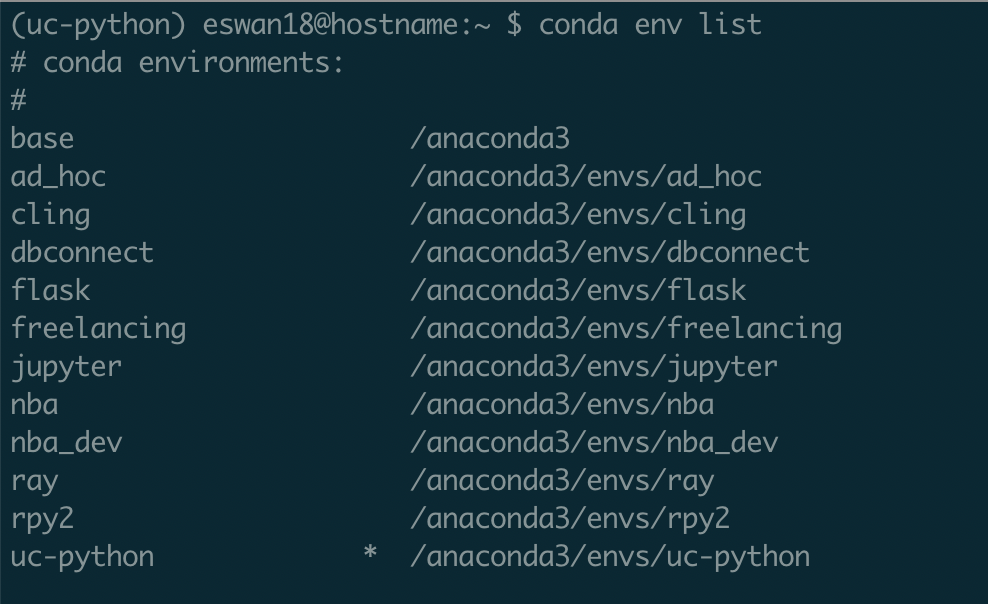
You can switch into an environment with
conda activate <environment_name>
Conda will update your prompt with the name of the environment you're in so you don't forget.
And you'll have switched to that environment's Python and packages if you open the Python REPL or run a Python script.


To create a new environment, use
conda create -n <environment_name> python=<python_version>
For example, if I wanted an environment called "data-modeling" with Python 3.7 installed, I'd run
conda create -n data-modeling python=3.7
Then you can switch into the environment using
conda activate data-modeling
as we saw above.
From within environments, you can install packages using
conda install <package_name>
Or, if you want a specific version of a package, you can tell conda:
conda install <package_name>==<package_version>
If I wanted to install seaborn version 0.9, I would run
conda install seaborn==0.9
When finished working within an environment, you can run conda deactivate or simply close the terminal window.
Your Turn
If you're using Python locally (not in Binder) and have conda installed, try setting up a new environment with Python 3.7.
Call it first_env.
Install Pandas version 0.24 in it.
A Note on Python Versions
In your work in Python, you're sure to run into compatibility issues sooner or later. In general, these are annoying but you can quickly figure out a fix -- install a newer package or slightly update the code you're running.
However, one kind of compatibility issue can be particularly vexing: a Python version issue.
As Python has progressed and become more popular, many nice features have been added or updated.
One good example is the print function -- before Python 3, it wasn't a function! Users used the syntax print x instead of print(x).
That means if you run Python 2 code on Python 3, you will get errors.
Unfortunately, large companies and organizations aren't known for rapidly adopting new technology. Python 2, while quite old at this point, is still in use in some sectors.
It's often a good idea to quickly note the version of Python you're using when starting work in a new environment.
This can be done with
import sys
sys.version
'3.11.6 | packaged by conda-forge | (main, Oct 3 2023, 10:37:07) [Clang 15.0.7 ]'
In general, code written on older Python versions will still work on newer versions -- this is called backward-compatibility. The main notable exceptions are the breaking changes from Python 2 to Python 3, mentioned above (remember we talked about how major version bumps are bigger than minor version bumps).
All the structures and syntax of Python we've taught in these workshops should work on any Python 3.x. The newest stable version of Python is 3.11, which came out in last October. You can find release history here.
Conda environments with Jupyter Notebooks
You probably will use Jupyter notebooks more than the command line, though; luckily it's possible to use conda environments in Jupyter (we're doing so right now, actually).
You will always need to create and manage packages from the command line (that's where you'll do package installs), but you can activate an environment within Jupyter.
For that to be possible, you'll need to follow some one-time steps on the command line first.
Let's say our environment is called data-modeling.
conda activate data-modeling
conda install ipykernel
python -m ipykernel install --user --name data-modeling --display-name data-modeling
Notice that the third line has two places where you'll need to insert your environment name.
The above code activates the environment, installs the package that handles connecting conda to Jupyter, and then runs some code from that package to create a Jupyter kernel.
Kernels
Kernels are connections from Jupyter to a Python environment.
Every kernel is associated with an environment (it has to be), but the opposite is not necessarily true; that can happen if you create an environment but don't run the code to set up a kernel (we saw it above).
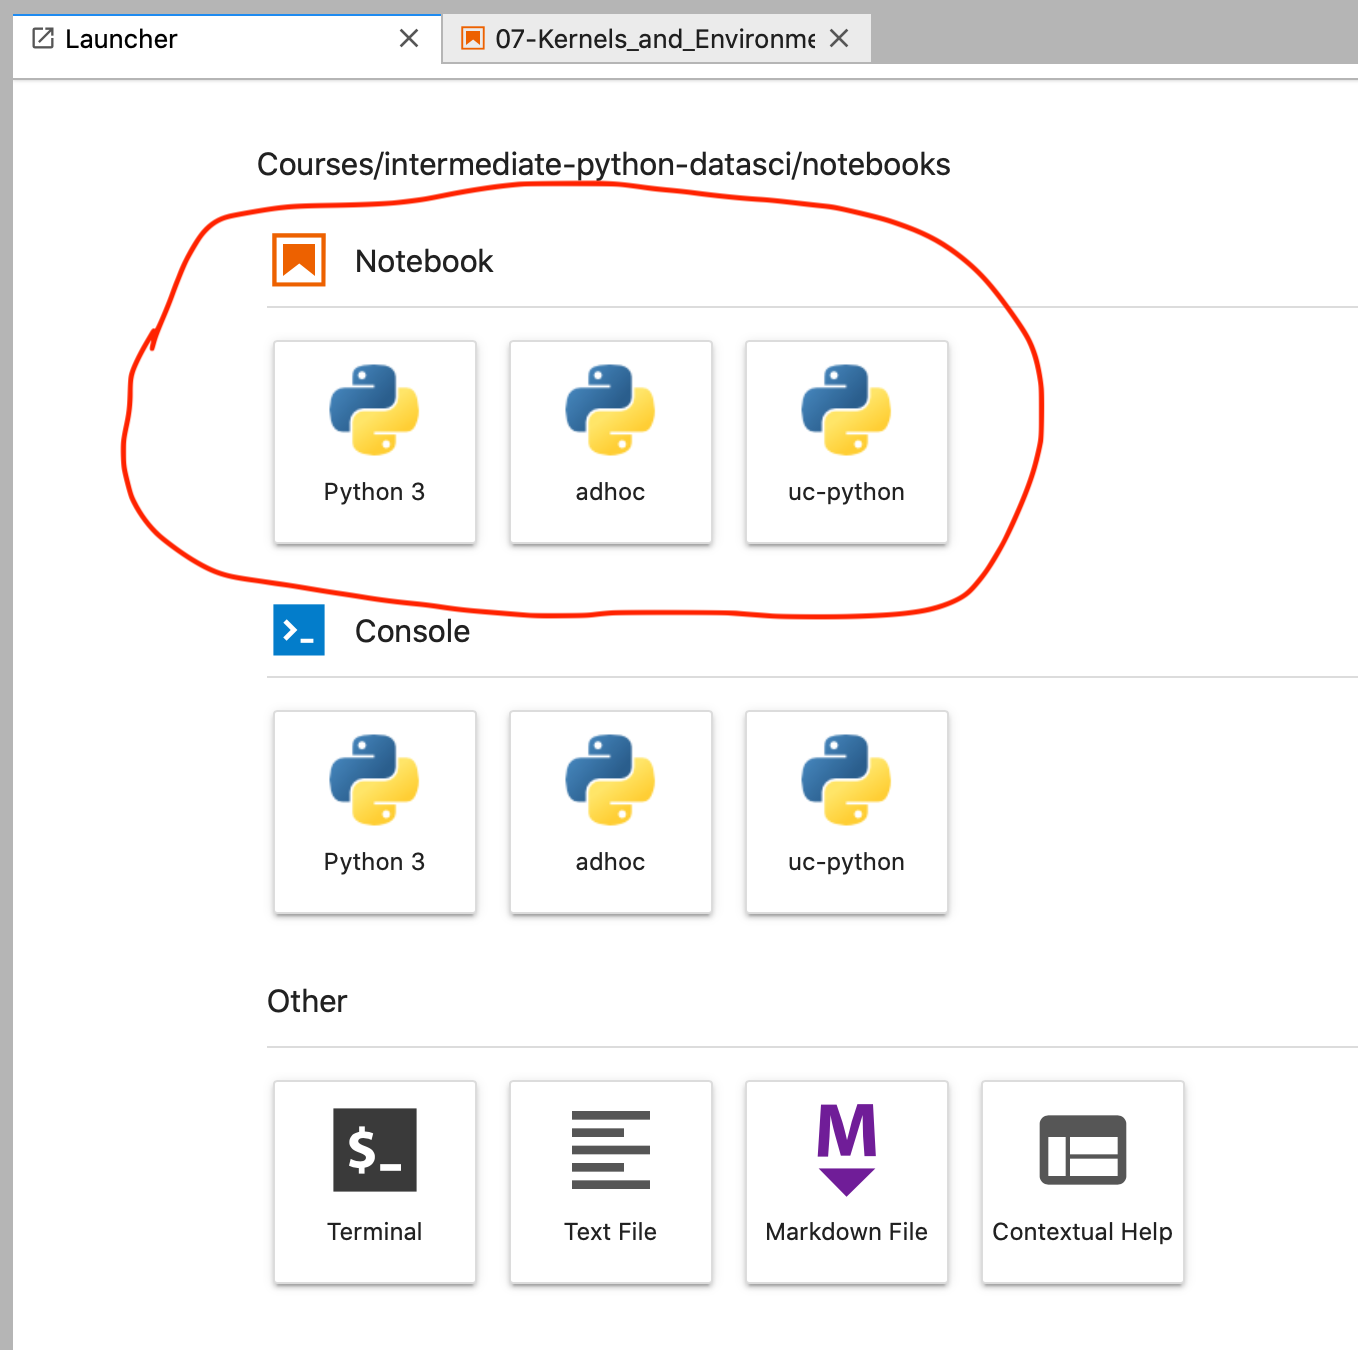
You can see all available kernels in Jupyter when you open a new notebook.

When you create a new notebook and choose a kernel, the associated environment's Python installation and packages are what will be available within the notebooks.
For example, if I select uc-python in the New dropdown, I'll only have access to whatever version of Python (and of Pandas, Seaborn, etc) that I installed in the uc-python environment from the command line.
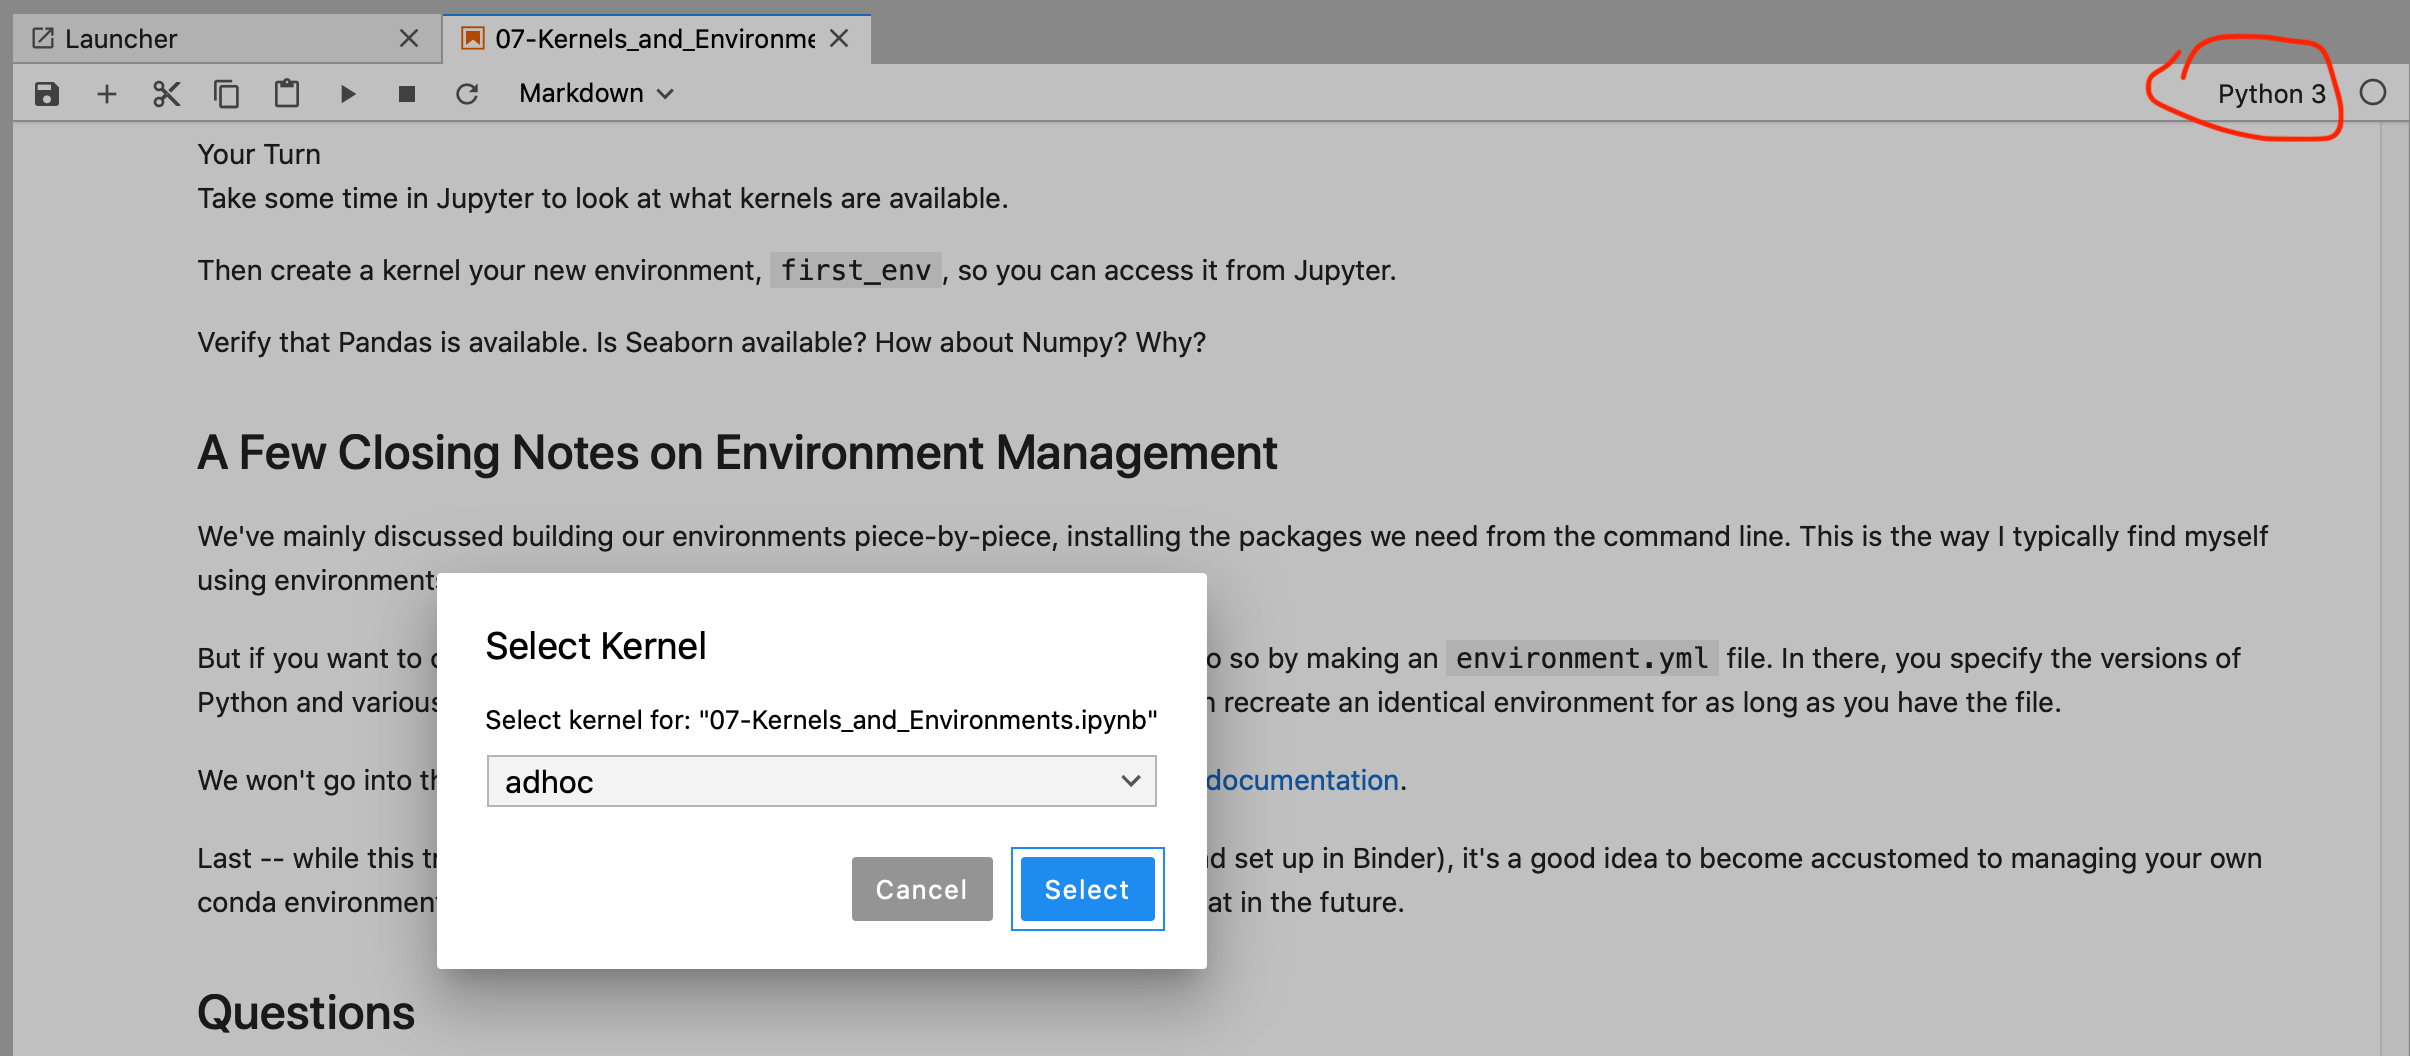
Fortunately, you can also switch a notebook's kernel even after it's been created; just click on Kernel > Change Kernel in the menu bar within Jupyter.

Your Turn
Take some time in Jupyter to look at what kernels are available.
Then create a kernel your new environment, first_env, so you can access it from Jupyter.
Verify that Pandas is available. Is Seaborn available? How about Numpy? Why?
A Few Closing Notes on Environment Management
We've mainly discussed building our environments piece-by-piece, installing the packages we need from the command line. This is the way I typically find myself using environments.
But if you want to create a long-lasting definition of an environment, you can do so by making an environment.yaml file.
In there, you specify the versions of Python and various packages that you'd like to be installed -- and then you can recreate an identical environment for as long as you have the file.
We won't go into this in any more detail, but it's covered in depth in the conda documentation.
Last -- while this training runs on an environment we've already configured (and set up in Binder), it's a good idea to become accustomed to managing your own conda environments if you plan to work on projects that you'll be looking back at in the future.
Questions
Are there any questions before we move on?