Git and GitHub
Lesson Goals
- Understand the purpose of version control systems
- Create a GitHub account
- Upload your first code to GitHub
Prerequisites
- None
Code Management
Some new considerations come up as we build larger projects that eventually go into production...
- What happens if our computer breaks or is lost? Will we lose all of our code?
- What if we make changes to our code that we later want to roll back? For example, trying a different method of cleaning our data and eventually discovering that it yields worse results.
- How do multiple people work on the same project without sending files back and forth, and stepping on each others' toes?
Discussion
Has anyone faced problems like these before?Version Control Systems (VCS)
The most common industry solution is a Version Control System, which:
- Provides a backup of your code on a separate computer
- Tracks every change made to the code, allowing you to see when certain code was updated and to roll back to an earlier state if necessary
- Helps with collaboration by letting contributors work on different things in parallel and then "merge" their changes together later
Typically, an organization will have one central VCS where all projects are managed.
Common VCS Options
Far and away the most popular VCS tool is Git, which is notable for its scalability and performance.
Unfortunately, it's often challenging for beginners; its interface can be overwhelming.
Other VCSes exist, and were more common until Git became dominant around 2010. You may have heard of these or even used them:
- Mercurial
- Subversion
Git and GitHub
Git is generally used in tandem with a website where your code can be kept, viewed, and managed. There are several, but the most commonly used site is GitHub.
Not only does GitHub provide a good interface for viewing code, it also features:
- Project management tools
- Collaboration tools
Both of which are tightly integrated with your code -- very convenient for developer and data science teams.
GitHub offers most of its tools for free and has become the home of most popular open source projects (such as Python itself and the pandas library).
Note
There are competing services to GitHub, such as GitLab and Bitbucket, but GitHub is by far the most popular tool -- to the point that employers sometimes ask for your GitHub profile to see your portfolio.Creating a GitHub Account
(If you already have a GitHub account, you may skip these steps. Just log into your account so we can push code to it later.)
- Go to
github.comand find the Sign Up button.
- When prompted, enter your email address, a new password, and a username
- This username will be your identifier on GitHub, so make sure you'd be comfortable sharing it with an employer or colleague
You may then need to solve a Captcha-like puzzle and verify your email address. Do so.
Once the account is created, you may be asked whether to create a new project, or "repository". We'll do that, but not yet!
GitHub Tour
Demo of Profile and Repos
Repositories
- As we saw, repositories are just projects.
- For short, we usually call them repos.
- Generally, it's good to have a unique repository in GitHub for every project you work on.
- Let's create a repo for the code we write in this workshop!
Creating a Repo
- Go back to GitHub.
- If today is the first time you've used GitHub, the site may immediately prompt you to create a repo. If so, click that.
- If not, look in the left sidebar for a "New" button and click that -- it should take you to a repo creation page.
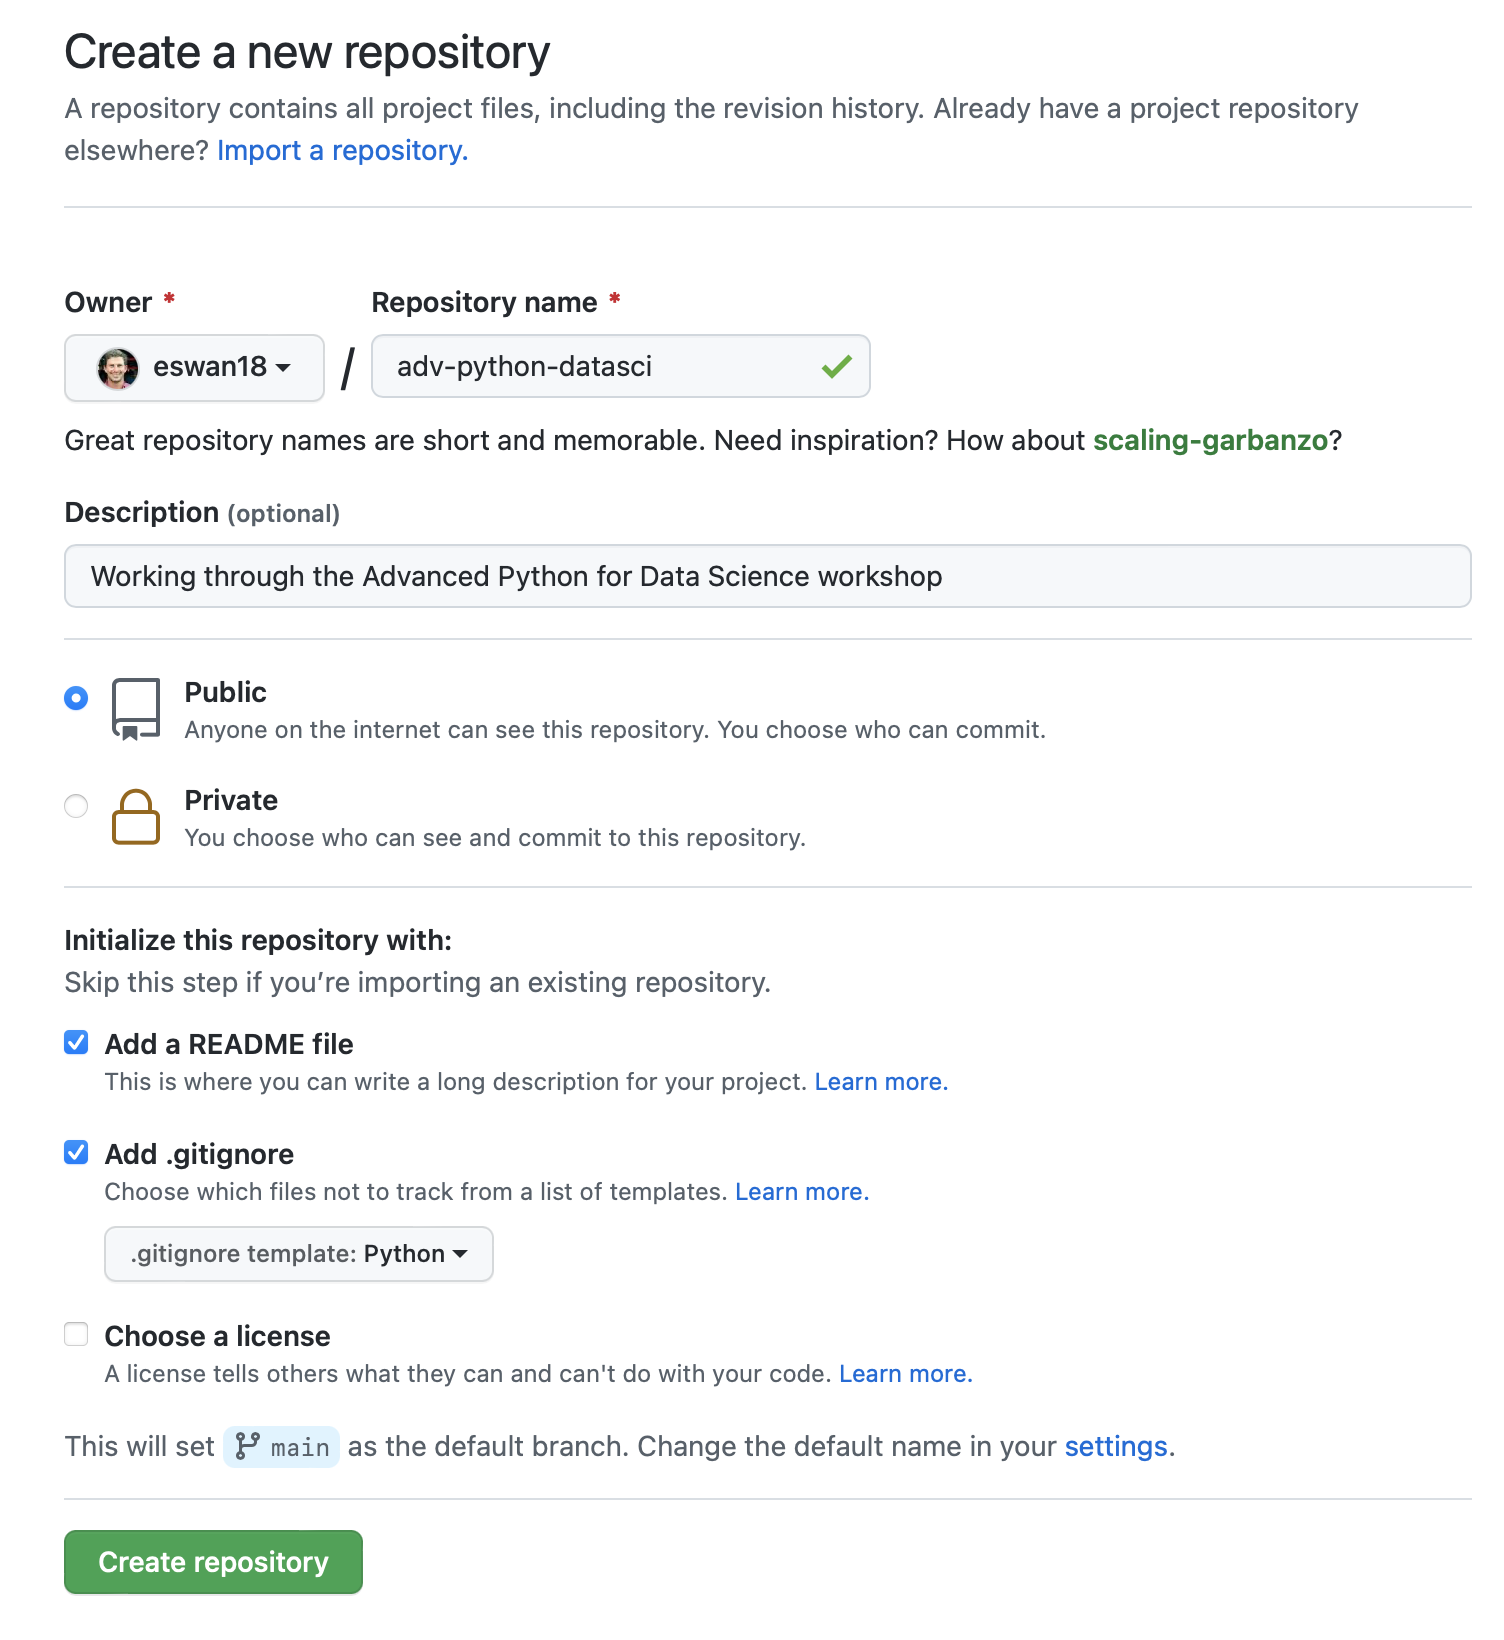
- In the Name field enter "advanced-python-datasci", and in the Description enter "Working through the Advanced Python for Data Science workshop".
- There are three boxes below; check the first two. Those should be "Add a readme" and "Add a gitignore".
- The gitignore checkbox should show a dropdown below it, "gitignore template". Look through that list and select Python.
- Then press the "Create Repository" button!
GitHub Desktop
Next, we'll download a piece of software from GitHub that handles syncing our code with our repository: GitHub Desktop
Note: if you're already comfortable using Git from the command line, you can skip this part; just clone the repo we've created as we'll be using it for the rest of the workshop.
- Go to https://desktop.github.com and download the application.
- Once it's downloaded and installed, open it.
Connecting Our Repo to GH Desktop
The last bit of direction-following!
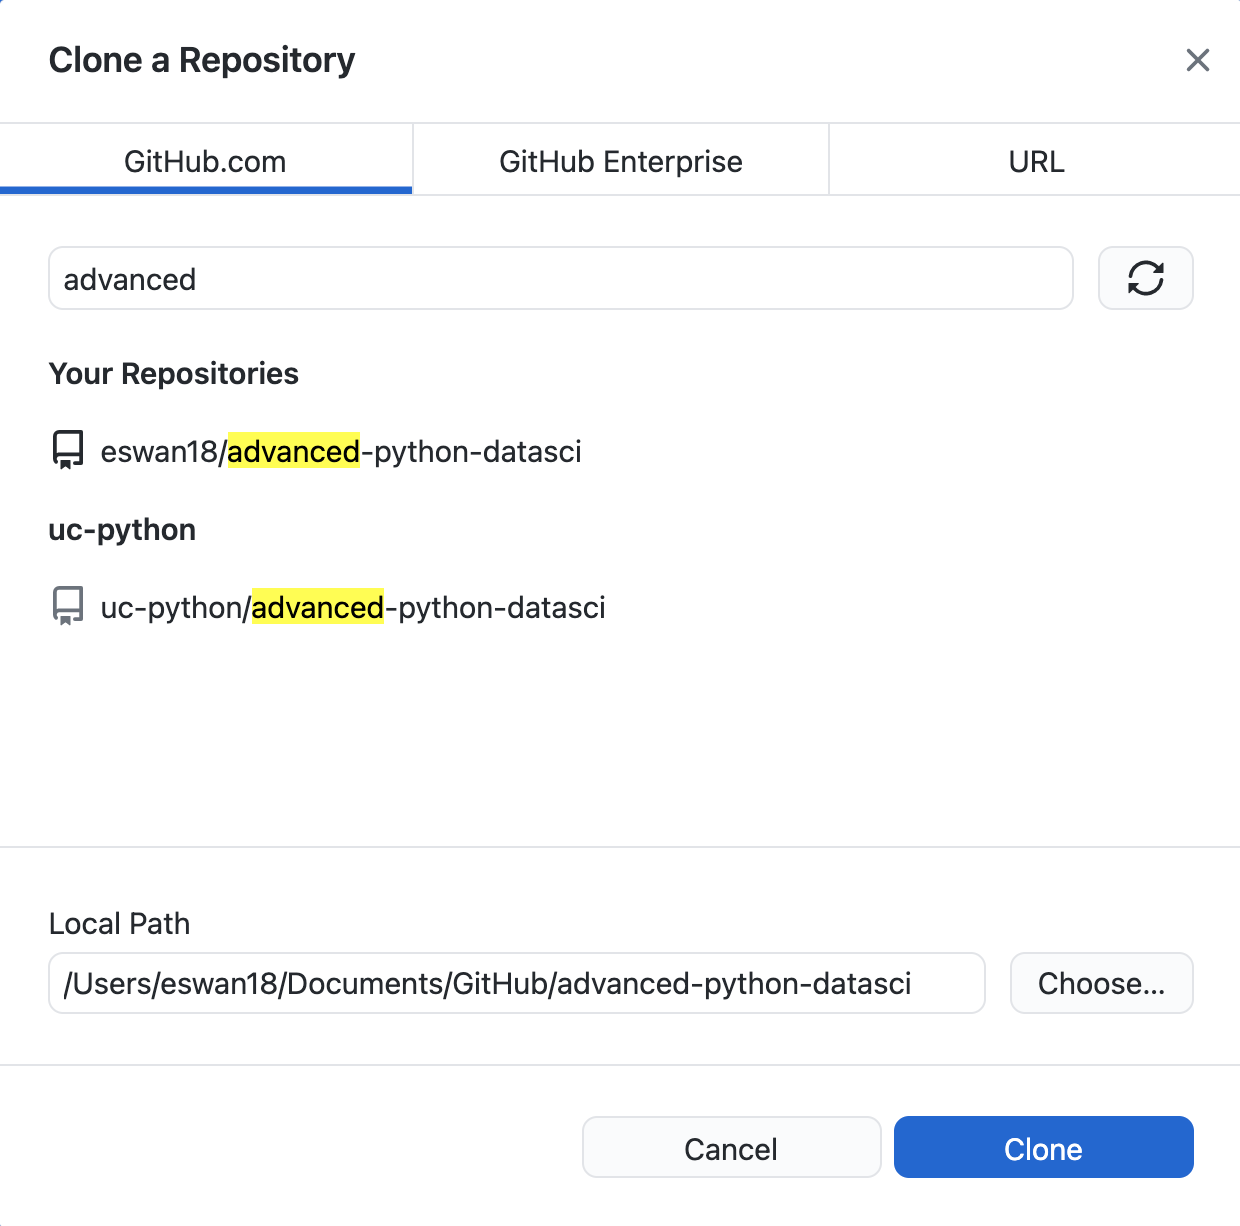
- In GitHub Desktop, you should see an option like Clone a Repository from the Internet.... Click this.
- At this point, the application should prompt you to sign into GitHub. Follow its instructions to do so, which may involve it redirecting you to the browser.
- Once done signing in, you may have to press Clone a Repository from the Internet... again.
- Choose the advanced-python-datasci project we just created.
- Optionally, you may change the Local Path -- this is where the repository will be saved on your computer. You'll need to be able to open the code here in JupyterLab, so if you're more comfortable keeping your code somewhere else, change this to a different location on your computer.
- Then press Clone to pull down the repository we created.
Congrats! You've set up your first GitHub repository, and now you're ready to work in it.
Questions
Are there any questions before we move on?